Android Activity与Service通信

在Android中,Activity和Service分别管理着应用的前台和后台,他们都是相当重要的四大组件之一,那么Activity和Service之间是如何通信的呢?以下总结了四种可行的方法:

方法一:Binder类

该方法要求我们构造一个Binder类来封装Service实例,并在Service类中重写onBind方法返回该binder对象:

1
2
3
4
5
6
7
8
9
10
11
12
13
14
15
16
17
18
public class MyService extends Service {  

@Override
public IBinder onBind(Intent intent) {
return new MyBinder();
}

class MyBinder extends Binder {
/**
* 获取service实例
* @return
*/
public MyService getService() {
return MyService.this;
}
}

}

在Activity中我们则需要使用bindService方法绑定Service,并传入一个ServiceConnection参数,通过其onServiceConnected方法来获取binder实例,进而获取service实例:

1
2
3
4
5
6
7
8
9
10
11
12
13
14
15
16
17
18
19
20
21
22
23
24
25
26
public class MyActivity extends Activity{  

// 服务实例
private MyService myService = null;
private ServiceConnection connection = new ServiceConnection() {

@Override
public void onServiceDisconnected(ComponentName name) {
}

@Override
public void onServiceConnected(ComponentName name, IBinder service) {
// 获取服务实例
myService = ((MyService.MyBinder)service).getService();
}
};

@Override
protected void onCreate(Bundle savedInstanceState) {
super.onCreate(savedInstanceState);
setContentView(R.layout.activity_main);
Intent intent = new Intent(this, MyService.class);
bindService(intent, connection, BIND_AUTO_CREATE);
}

}

方法二:通过内部类广播

我们可以分别在Service和Activity中实现两个广播内部类,当两个组件需要互相通信的时候只要发送适当的广播即可:

1
2
3
4
5
6
7
8
9
10
11
12
13
14
15
public class MyService extends Service {  

@Override
public IBinder onBind(Intent intent) {
return null;
}

class MyServiceBroadcastReceiver extends BroadcastReceiver {
@Override
public void onReceive(Context context, Intent intent) {
// do something
}
}

}
1
2
3
4
5
6
7
8
9
10
11
12
13
14
15
16
17
18
public class MyActivity extends Activity{  

@Override
protected void onCreate(Bundle savedInstanceState) {
super.onCreate(savedInstanceState);
setContentView(R.layout.activity_main);
Intent intent = new Intent(this, MyService.class);
startService(intent);
}

class MyActivityBroadcastReceiver extends BroadcastReceiver {
@Override
public void onReceive(Context context, Intent intent) {
// do something
}
}

}

方法三:Messenger

Messenger类的官方注释如下:

1
2
3
4
5
6
/** 
* Reference to a Handler, which others can use to send messages to it.
* This allows for the implementation of message-based communication across
* processes, by creating a Messenger pointing to a Handler in one process,
* and handing that Messenger to another process.
*/

从注释我们可以得知,这是一个基于Message的,使用Handler来处理消息的,进程间组件通信的工具类。
Messenger的使用方法如下:
Service类:

1
2
3
4
5
6
7
8
9
10
11
12
13
14
15
16
17
18
19
20
21
22
23
24
25
26
27
28
29
30
31
32
33
34
35
36
public class MyRemoteService extends Service {  

private final String TAG = "MyService";

@Override
public IBinder onBind(Intent intent) {
// 返回Messenger的Binder对象
return messenger.getBinder();
}

@Override
public void onCreate() {
super.onCreate();
Log.v(TAG, "onCreate");
}

// 传入一个Handler参数用来处理消息,Handler默认构造方法绑定主线程
private Messenger messenger = new Messenger(new Handler() {
public void handleMessage(android.os.Message msg) {
// 收到消息打印Log
Log.v(TAG, "Get Message from remote activity : " + ((Bundle)msg.obj).getString("String"));
// 回复服务端消息
Message msgReply = Message.obtain();
// 使用Bundle类包装信息
Bundle bundle = new Bundle();
bundle.putString("String", "From Remote Service");
msgReply.obj = bundle;
try {
msg.replyTo.send(msgReply);
} catch (RemoteException e) {
e.printStackTrace();
}
};
});

}

在Service类中我们构造了一个Messenger对象,并在onBind方法里调用了Messenger的getBinder方法,返回了一个IBinder对象。我们在构造Messenger对象时传入了一个Handler参数,该Handler用于处理从服务端接收到的Message。此处我们把接收到的消息通过Log打印出来,并获取Message中的replyTo属性发送一条消息作为回复。

1
2
3
4
5
6
7
8
<service android:name="com.example.test.MyRemoteService"  
android:enabled="true"
android:exported="true">
<intent-filter>
<action android:name="com.example.test.messenger"/>
<category android:name="android.intent.category.DEFAULT"/>
</intent-filter>
</service>

以上是Service注册表的信息,记得设置好Action和exported属性以便外部应用访问,此处把enabled属性设置为true允许其让系统启动。
接下来我们来看看另一个应用中Activity的代码:

1
2
3
4
5
6
7
8
9
10
11
12
13
14
15
16
17
18
19
20
21
22
23
24
25
26
27
28
29
30
31
32
33
34
35
36
37
38
39
40
41
42
43
44
45
46
47
48
49
50
51
public class MyActivity extends Activity {  

private final String TAG = "MyActivity";

// 用于发送消息
private Messenger messengerSender = null;
// 用于接收消息
private Messenger messengerReceiver = new Messenger(new Handler() {
public void handleMessage(android.os.Message msg) {
// 收到消息打印Log
Log.v(TAG, "Get Message from remote Service : " + ((Bundle)msg.obj).getString("String"));
};
});
private ServiceConnection connection = new ServiceConnection() {

@Override
public void onServiceDisconnected(ComponentName name) {
}

@Override
public void onServiceConnected(ComponentName name, IBinder service) {
// 获取来自Service的Binder对象,构造MessengerSender用于发送消息
messengerSender = new Messenger(service);
// 发送消息
Message message = new Message();
// 设置消息返回的Messenger
message.replyTo = messengerReceiver;
// 设置消息内容
Bundle bundle = new Bundle();
bundle.putString("String", "From Activity");
message.obj = bundle;
try {
messengerSender.send(message);
} catch (RemoteException e) {
e.printStackTrace();
}
}
};

@Override
protected void onCreate(Bundle savedInstanceState) {
super.onCreate(savedInstanceState);
setContentView(R.layout.activity_main);

// 绑定远程Service
Intent intent = new Intent();
intent.setAction("com.example.test.messenger");
bindService(intent, connection, Context.BIND_AUTO_CREATE);
}

}

在Activity中我们构造了两个Messenger,一个传入Handler参数构造用于处理接收到的Message,一个传入在ServiceConnection中获取的IBinder对象用于发送Message。在Activity中我们通过指定Action,使用bindService方法完成Activity与Service的绑定。此处我们在与Service建立连接后发送了一条消息给Service,并把Service返回的消息给打印出来。
Service所在进程日志
Activity所在进程日志
从Logcat信息中我们可以看出Activity和Service通信成功了,并且是在两个应用,各自的进程当中(PID不同)。
值的注意的是,通信过程中Message的obj对象必须是实现了Parcelable接口的,否则系统会报RuntimeException:Can’t marshal non-Parcelable objects across processes.一般而言我们只需要使用Bundle类包装要传输的数据即可。

方法四:AIDL

AIDL:Android Interface Definition Language,即Android接口定义语言。要是使用Messenger还不能满足你的需求,我们就必须使出AIDL这项工具来实现进程间通信了。那么AIDL适用于什么场景呢?我们来看看官方的解释:
Using AIDL is necessary only if you allow clients from different applications to access your service for IPC and want to handle multithreading in your service. If you do not need to perform concurrent IPC across different applications, you should create your interface by implementing a Binder or, if you want to perform IPC, but do not need to handle multithreading, implement your interface using a Messenger. Regardless, be sure that you understand Bound Services before implementing an AIDL.
上面最重要的就是第一句话:只有当你允许来自不同的客户端访问你的服务并且需要处理多线程问题时你才必须使用AIDL。在其他情况下你都可以选择其他方法,如使用Messager,也能跨进程通讯。可见AIDL是处理多线程、多客户端并发访问的。
那么接下来我们就来看看如何使用AIDL吧:
首先我们在src下面编写.aidl文件定义接口,其语法与java类似:

1
2
3
4
5
package com.example.aidl;  

interface IRemoteService {
String sendMessage(String s);
}

在定义了该aidl文件后,保存后Android编译器会在gen目录下自动生成对应的文件:
aidl生成文件
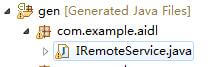
注意,在Activity和Service所在的应用中都必须有完全相同的aidl文件,包名称也必须相同,否则会报java.lang.SecurityException: Binder invocation to an incorrect interface的错误。
接下来我们就可以利用aidl定义的接口编写Service和Activity了:

1
2
3
4
5
6
7
8
9
10
11
12
13
14
15
16
17
18
19
20
21
22
23
24
25
26
27
public class MyRemoteService extends Service {  

private final String TAG = "MyService";

@Override
public IBinder onBind(Intent intent) {
// 返回IRemoteService.Stub对象
return binder;
}

@Override
public void onCreate() {
super.onCreate();
Log.v(TAG, "onCreate");
}

private final IRemoteService.Stub binder = new IRemoteService.Stub() {

@Override
public String sendMessage(String s) throws RemoteException {
// 通过Log打印传入的字符串
Log.v(TAG, "String from Activity : "+s);
return "Service Message!";
}
};

}

在Service中我们实现了IRemoteService内部的Stub类,并把它当做返回值在onBind方法返回给建立连接的组件。
Service的xml代码与Messenger相比没有什么改动,故不再贴出来。
接下来是Activity的代码:

1
2
3
4
5
6
7
8
9
10
11
12
13
14
15
16
17
18
19
20
21
22
23
24
25
26
27
28
29
30
31
32
33
34
35
public class MyActivity extends Activity {  

private final String TAG = "MyActivity";
private IRemoteService mRemoteService;

private ServiceConnection connection = new ServiceConnection() {

@Override
public void onServiceDisconnected(ComponentName name) {
}

@Override
public void onServiceConnected(ComponentName name, IBinder service) {
mRemoteService = IRemoteService.Stub.asInterface(service);
try {
Log.v(TAG, mRemoteService.sendMessage("Activity Message!"));
} catch (RemoteException e) {
e.printStackTrace();
}
}
};

@Override
protected void onCreate(Bundle savedInstanceState) {
super.onCreate(savedInstanceState);
setContentView(R.layout.activity_main);
Log.v(TAG, "onCreate");

// 绑定远程Service
Intent intent = new Intent();
intent.setAction("com.example.test.aidl");
bindService(intent, connection, Context.BIND_AUTO_CREATE);
}

}

我们利用Stub的asInterface方法构造了用于通信的IRemoteService接口,通过接口定义的sendMessage方法向另一个进程中的Service发送了一条消息,并把Service返回的信息打印了出来。
通过Logcat我们可以发现,在两个进程中的Activity和Service通信成功了(PID不同):
Service所在进程日志
Activity所在进程日志
值的注意的是Activity是在主线程中与Service通信,而Service却并没有在主线程通信,而是新开启了一个线程和Activity通信(TID不同)。这也印证了官方对于AIDL工具的定位,当我们需要在不同进程中实现组件通信,并且需要处理多线程问题时,才使用AIDL,不然我们还是用回简单方便的Messenger吧。
总结:

  1. Activity调用bindService方法,通过IBinder对象得到Service的实例,这样Activity可以直接调用到Service中的方法,如果需要Service主动通知Activity,我们还可以为其添加回调方法。
  2. Service向Activity发送消息,可以使用广播,当然Activity要注册相应的接收器。比如Service要向多个Activity发送同样的消息的话,用这种方法就更好。
  3. 当Activity和Service分别处在不同的应用之中时,我们可以通过使用Messenger类来完成两组件之间的基于Message机制的交流通信,使用Handler来处理发送接收的消息。
  4. 当不仅Activity和Service所处应用不同,而且我们还需要处理多线程通信问题时,我们就需要使用AIDL来进行通信了。